How to replace components of Fuji placement machine NXT component camera, positioning camera, module CPU box and other components
Jan 27, 2024
2. Replacement of component camera
(2) Replacement method
3. Replacement of positioning camera
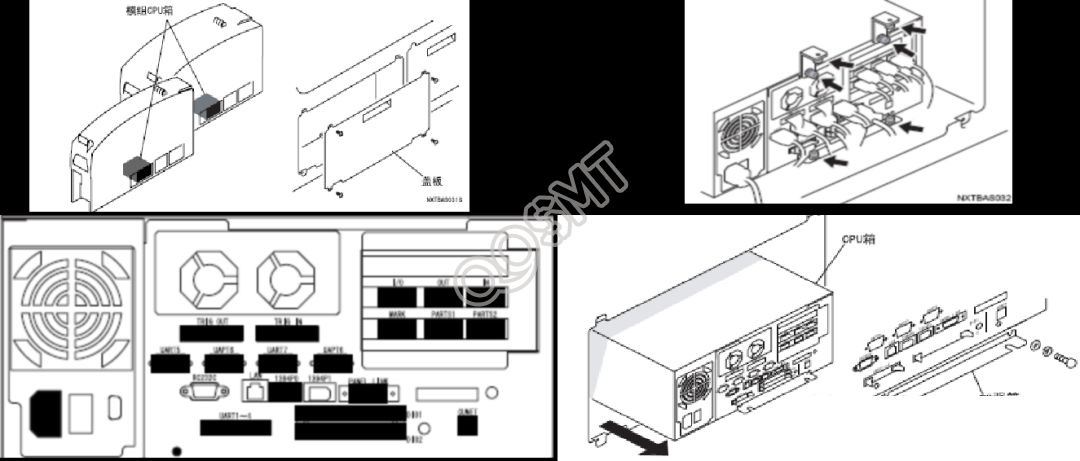
1. Replacement of module CPU box
1. If necessary, please record the graph of the matrix data of each module.
2. Turn off the main power switch to cut off the power of the machine.
3. Remove the screws (4 pieces) and take off the cover.
4. Remove the 6 bolts (6 pieces) that secure the CPU box.
5. Remove the plug from the section shown.
6. Take out the CPU box from the module body and remove the reinforcing ribs from the CPU box.
7. Install the module body in the reverse steps of removing the new CPU box.
8. If you obtain the matrix data graphics in the 1. project, please transfer the matrix data to each module after restarting.
2. Replacement of component camera
The camera cover, lamp, zoom lens and camera body are handled as a unit. It is not possible to replace individual parts.
(1) Necessary tools
A set of Phillips screwdrivers and hexagonal wrenches.
(2) Replacement method
1. Pull out the module.
2. Turn off the main power switch.
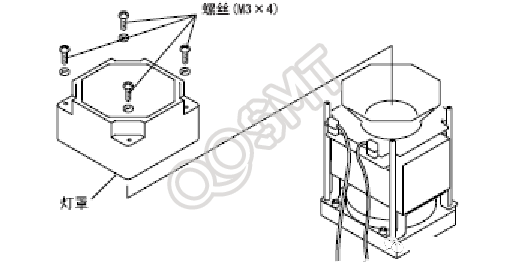
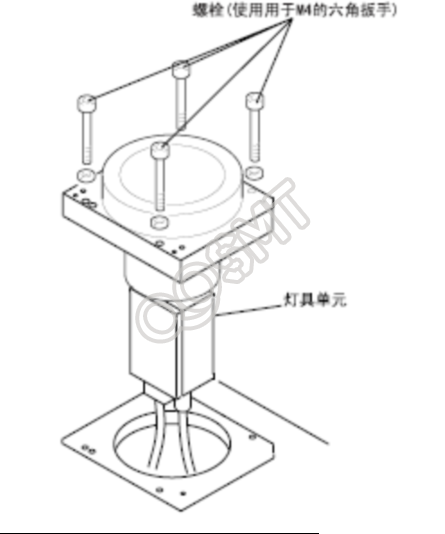
3. Use a screwdriver to loosen and remove the 4 screws (4 screws) used to fix the light source cover.
4. Use a screwdriver to loosen the 4 screws fixing the cover and remove it.
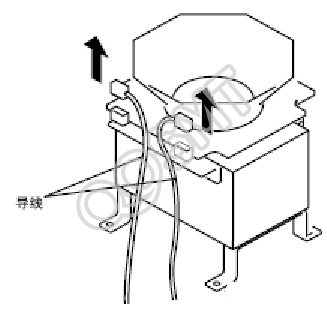
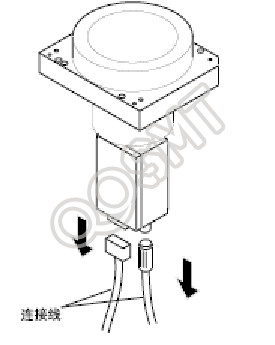
5. Remove the wire plugs (2 pcs.).
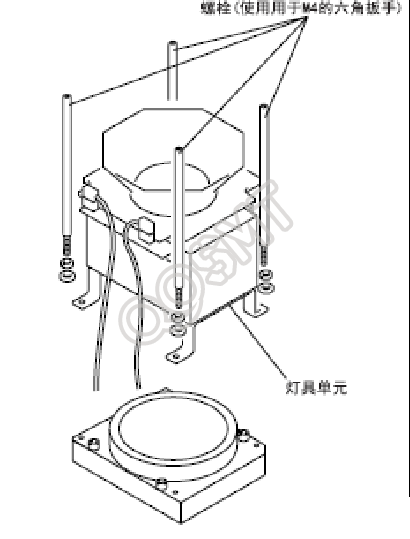
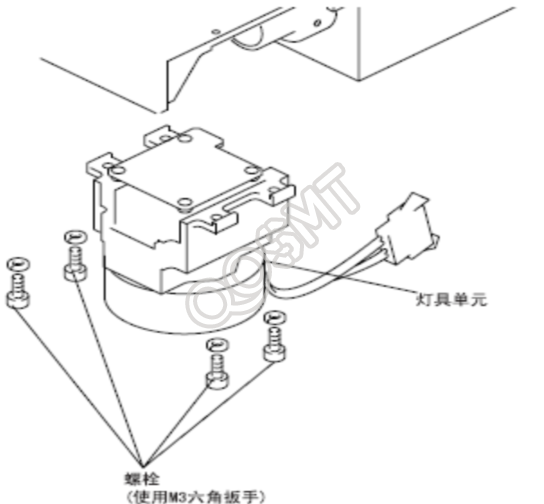
6. Use a wrench to loosen the bolts (4) and remove. Carefully remove the light fixture.
7. Use a wrench to loosen the bolts (4) fixed to the camera unit and remove.
8. Remove the cable plugs (2 pieces) from the rear of the camera.
9. Install the new unit in the reverse order of removal.
10. Turn on the main power switch and then power on the module.
11. Insert the module.
3. Replacement of positioning camera
The camera cover, lamp, zoom lens and camera body are handled as a unit. It is not possible to replace individual parts.
(1) Necessary tools
Set of hexagonal wrenches, M5.5 wrench.
(2) Replacement method
1. Pull out the module.
2. Turn off the main power switch.
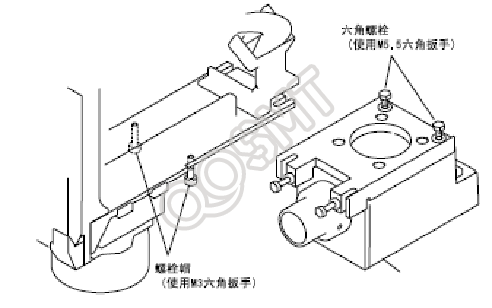
3. Remove the socket from the rear of the camera.
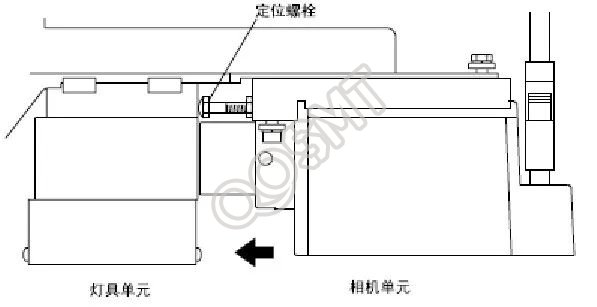
4. Loosen the bolt (2 pcs) caps and hexagonal bolts (2 pcs), slide the camera back and remove it.
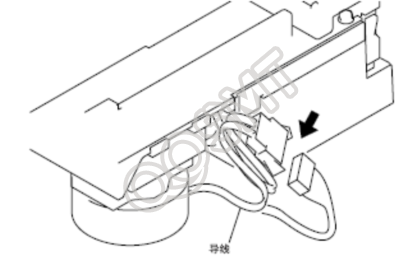
5. Remove the cable socket from the lighting unit.
6. Loosen the bolts (4) and remove the lighting unit.
7. Install the new unit in the reverse order of removal.
Note: Please slide forward to secure the camera unit until the positioning bolt installed on the front of the camera unit touches the lighting unit.
8. Turn on the main power switch and then power on the module.
9. Insert the module.